…but do you recall the most famous reindeer of all?
It’s Rudolph! Doesn’t he look like he’s ready to guide Santa’s sleigh?
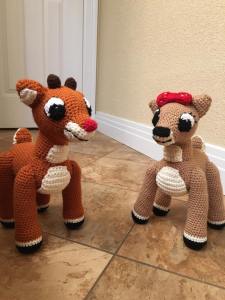
Not only is this Rudolph cheerful, he’s also quite huggable. He is pretty big, too. From toe to antlers, he measures about 12 inches tall. I crochet pretty tightly, so yours might end up even a little bit bigger. Clarice is made very similarly, and you can find the pattern for her here.
Though this pattern has not had any official testers, several of you have sent me pictures of your finished work. I’m so glad to see that this pattern is working out great for you. If you haven’t shared your pictures with me yet, I’d love to see what you come up with!
Happy crocheting!
Abbreviations used:
sc – single crochet
dec 2 tog – decrease two together (sometimes called sc2tog)
F/O – fasten off
dec 3 tog – decrease three together (sometimes called sc3tog)
Supplies needed:
Yarn in the following colors: orangish-brown, dark brown, red, off-white, black, and white
Fiberfill
Yarn needle
Scissors
G hook (4.0 mm)
Head – make 1, starting w/ orangish-brown
1. 6 sc in ring (6)
2. 2 sc in ea around (12)
3. 2 sc in ea around (24)
4. *1 sc, 2 sc* around (36)
5. 1 sc in ea around (36)
6. *1 sc in 2, 2 sc* around (48)
7. 1 sc in ea around (48)
8. 1 sc in ea around (48)
Repeat row 8 (9 times)
18. *1 sc in 2, dec 2 tog* around (36)
19. 1 sc in ea around (36)
20. 1 sc in ea around (36)
21. 1 sc in 18, *1 sc in 1, dec 2 tog* 6 times (30)
22. 1 sc in ea around (30)
23. 1 sc in 15, *1 sc, dec 2 tog* 5 times (25)
24. 1 sc in ea around (25)
25. *1 sc in 3, dec 2 tog* around (20)
26. 1 sc in ea around (20)
27. 1 sc in ea around (20)
28. 1 sc in ea around (20)
29. *1 sc in 2, dec 2 tog* around (15)
30. *1 sc, dec 2 tog* around (10)
31. *dec 2 tog* around (5)
weave end thru 5, pull tight & F/O
weave in ends
Nose – make 1 in red
1. 6 sc in ring (6)
2. *1 sc, 2 sc* 3 times (9)
3. 1 sc in ea around (9)
Antlers – make 2 in dark brown
1. 6 sc in ring (6)
2. *1 sc, 2 sc* around (9)
3. 1 sc around (9)
Repeat round 3 (1 time) F/O
Body – make 1 in orangish-brown
1. 6 sc in ring (6)
2. 2 sc in ea around (12)
3. 2 sc in ea around (24)
4. *1 sc, 2 sc* around (36)
5. 1 sc in ea around (36)
6. *1 sc in 2, 2 sc* around (48)
7. 1 sc in ea around (48)
Repeat round 7 (29 times)
37. *1 sc in 2, dec 2 tog* around (36)
38. *1 sc, dec 2 tog* around (24)
39. *dec 2 tog* around (12)
40. *dec 2 tog* around (6)
weave end thru 6. pull tight. F/O
Belly – make 1 in off-white
**Note: with amigurumi, I prefer not to chain when I turn. This creates a straighter edge, which makes for neat assembly
1. Ch. 7, turn, sc in ea (6), turn
2. 2 sc, sc in 4, 2 sc, turn (8)
3. 2 sc, sc in 6, 2 sc, turn (10)
4. 2 sc, sc in 8, 2 sc, turn (12)
5. sc in ea across, turn (12)
Repeat round 5 until piece is long enough to go under body
– dec 2 tog, sc in 8, dec 2 tog (10)
– dec 2 tog, sc in 6, dec 2 tog (8)
– dec 2 tog, sc in 4, dec 2 tog (6)
– *dec 2 tog* three times (3)
– dec 3 tog F/O
Neck – make 1 in orangish-brown
1. Ch. 30, sl st to join (30)
2. sc in ea around (30)
Repeat round 2 (8 times) F/O
Ears – make 4 in orangish-brown
1. Ch. 9, turn, sc in ea, turn (8)
2. sc in ea across, turn (8)
3. 2 sc, sc in 6, 2 sc, turn (10)
4. dec 2 tog, sc in 6, dec 2 tog, turn (8)
5. sc in ea across, turn (8)
6. dec 2 tog, sc, dec 2 tog, sc, dec 2 tog, turn (5)
7. sc in ea, turn (5)
8. dec 2 tog, sc, dec 2 tog, turn (3)
9. dec 3 tog, F/O
**Note for assembly: Each ear is made up of two ear piece stitched together
Inside of Ear – make 2 in off-white
1. Ch. 6, turn sc in ea, turn (5)
2. sc in ea, turn (5)
3. dec 2 tog, sc in 1, dec 2 tog (3)
4. dec 3 tog, F/O
Tail – make 2 in off-white
1. Ch. 9, turn, sc in ea, turn (8)
2. sc in ea, turn (8)
3. 2 sc, sc in 6, 2 sc, turn (10)
4. dec 2 tog, sc in 6, dec 2 tog, turn (8)
5. sc in ea across, turn (8)
6. dec 2 tog, sc, dec 2 tog, sc, dec 2 tog, turn (5)
7. sc in ea across, turn (5)
8. dec 2 tog, sc, dec 2 tog, turn (3)
9. dec 3 tog, F/o
Top of Tail – make 1 in orangish-brown
1. Ch. 6, turn, sc in ea, turn (5)
2. sc in ea, turn (5)
3. sc in ea, turn (5)
4. sc in ea, turn (5)
5. dec 2 tog, sc in 1, dec 2 tog (3)
6. dec 3 tog, F/O
Legs – starting w/ black
1. 6 sc in ring (6)
2. 2 sc in ea (12)
3. 2 sc in ea (24)
4. BLO – sc around (24)
5. sc in ea around (24), switching to off-white
6. sc in ea around (24)
Repeat round 6 (24), switching to orangish-brown
8. sc in ea around (24)
Repeat round 8 – 2 times (24)
11. *sc in 4, dec 2 tog* 4 times (20)
12. sc in ea around (20)
Repeat round 12 – 20 times
33. *sc in 2, dec 2 tog* around (15)
34. 1 sc around
35. *sc in 1, dec 2 tog* around (10)
36. *dec 2 tog* around (5)
Weave end thru 5 and pull tight, F/O
Neck Fluff – make 1 in off-white
1. Ch. 8, turn and sc in 7 down (7), turn
2. sc in ea (7), turn
3. 2 sc, sc in 5, 2 sc (9), turn
4. sc across (9), turn
5. dec 2 tog, sc in 5, dec 2 tog (7), turn
6. dec 2 tog, sc in 3, dec 2 tog (5), turn
F/O
Muzzle – make 1 in off-white
1. ch. 15, turn, sc in ea across, turn (14)
2. dec 2 tog, sc in 10, dec 2 tog, turn (12)
3. sc in ea, turn (12)
4. dec 2 tog, sc in 8, dec 2 tog, turn (10)
5. sc in ea, turn (10)
6. sc in ea, turn (10
turn to work up side: hdc, dc, hdc, then sc across top

Eyes – make 2, beginning with black and switching to white at round 3
1. with black, 6 sc in ring (6)
2. continuing to work in the round, 1 sc, 2 sc, 2 sc, 1 sc, dec 2 tog (5) F/O, leaving long tail for sewing
3. join white with sl st at rounded end of pupil (as shown in pic above), with white, sc in same stitch as sl st join. sc in the next 4, sl st in last, turn, DO NOT CHAIN
4. skip sl st, hdc in next 5, sl st into round two to round out the white of the eye, F/O leaving long tail for sewing.


As you stitch the eye into place on your reindeer, the edges of the eyes will smooth out, making more of an eye shape. Use the tail of the black to sew on the black of the eye. Use the tail of the white to sew on the white of the eye. Using a small piece of white, you can stitch on catch lights if you want to.
Note: For a 3-D look, I outline the eyes with black yarn.
Assembly: using the pictures as a guide. Add stuffing to pieces as you go along.


This pattern is accurate to the best of my knowledge. If you have any questions or find needed corrections, please feel free to comment. And, if you make this lovable character, I’d love to see your pictures!
Happy crocheting!

Thank you so much for this pattern. I am going to start this project soon. I’m very much looking forward to your pattern for clarice.
LikeLike
Reblogged this on Calling All Fiber Artists and commented:
Check out Rudolph and Clarice from The Crochet Mommy.
Too cute!
LikeLike
Rudolph is gorgeous!! I Can’t wait for Clarice!!
LikeLike
Thank you for the pattern. It is beautiful. I’m so looking forward to your pattern for clarice.
LikeLike
I am working on this pattern. I go to line 25 on the head part. It reads *1sc in 3, Dec 2 tog* around (15)
The next lines 26 27 28 read 1sc in each around (20)
Shouldn’t line line 25 be (20)
LikeLike
Thanks so much for catching this! I’m editing it in the post.
LikeLike
Have you done the pattern for Clarice yet? I’m making Rudolph now would love to do her next. Thanks
LikeLike
I’m so sorry for taking so long! I’m working to get it posted very shortly!
LikeLike
How did you do the white part of the eyes? I tried to do it but didn’t come close to your pictures.
LikeLike
I’d love to help if I can. Did you see the picture I posted of just the eye up close?
LikeLike
Oh no…I just realized I left out a couple of rounds. I have fixed it now, but I imagine it’s too late! I’m sorry!
LikeLike
Is Clarice done yet??? I’d love to do her and Rudolph at the same time!
LikeLike
Working on it right now!
LikeLike
no instruction to join it together
LikeLike
Is there a particular part you are having trouble with?
LikeLike
Hiw did you join the legs to the body? Is it the top side of the legs down the side of body?
LikeLike
I would like instructions for putting the tail together. Is there stuffing between the two off whites or between the off white and orange?
LikeLike
Is this made with a magic loop or a chained ring
LikeLike
Gabrielle – I made mine with a magic loop. You could also chain two, and then sc the correct number of times in the farthest ch from the hook. Either way will work fine for this pattern.
LikeLike
can you tell how to put the ears together mine is not round?
LikeLike
I am so sorry I am just now seeing your comment! Did you ever figure the ears out?
LikeLike
The ears should not be round. They are a bit more pointed, to look like a reindeer’s ears. 🙂
LikeLike
Is this made in rounds or do you join with a slip stitch after each round?
LikeLike
Hi Darlene, thanks for asking! When I make my amigurumi characters, I always work in continuous rounds. No slip stitching and joining. I like how it creates a seamless look. Hope this helps!
LikeLike
I’m having a hard time understanding the instructions for the muzzle. what exactly do you mean by work up the side and then chain across the top? I thought I understood, but it seems uneven.
LikeLike
At that point on the muzzle, you are evenly single crocheting around the shape so that the whole shape is finished off nicely. Does that make sense? 🙂
LikeLike
Do you have the Santa pattern?
LikeLike
I do not. Is this something you’d be interested in my creating?
LikeLike
Not sure how to assemble neck. Do you sew to head and body stuffing as you go, Think this is way but want to double check before I mess it up!!!
LikeLike
That’s how I did it, too! 🙂 It’s an awkward part of the assembly, but just stuff as you go, stitching a little here and there, stuffing a little here and there until it is nice and firm. Hope this helps!
LikeLike
Thanks for your quick reply. I am down to crocheting the legs so should be finished by tomorrow. Great pattern…..thanks for sharing. I am taking Rudolph to a children’s home in Decatur, Alabama so you will be part of making some children happy. Thanks again. God Bless!!
LikeLike
I want to make Rudolph and Clarice for gifts. Gorgeous by the way! What brand did you find the Orangish Brown? I want to make sure i get the right color sceme from the same company/brand, so all yarn weight is the same. If you can help with the information i eould appreciate that. Thank you.
LikeLike
I wish I could remember the brand I used! I used some that I already had. I believe the color was “pumpkin”
LikeLike
Hi! Saw this pattern on pinterest and its super cute!! I’ve been working on it but im a little stuck on the eyes. After the white is joined to the black round, are there steps after it? I tried to copy the picture but i cant seem to get it quite right. Thanks!
LikeLike
Oh no! I just noticed I’ve left out a couple of steps. I will look at this tonight!
LikeLike
I have updated the pattern to include the white part of the eyes. I have no idea how I missed this. I’m sorry!
LikeLike
I have fixed this. I’m so sorry!
LikeLike
No problem!! Thank you so much!!
LikeLike
Hi there, Love the Rudolph and Clarice. I don’t understand the part on the ears, where you chain 9 and turn. How do you turn without a chain. Thank you
LikeLike
In amigurumi, I always turn without a chain. It makes a cleaner line. Did you figure out how to do this? If not, I’d like to help!
LikeLike
Hello, there are no instructions for the white part of the eyes. Can you please let me know how to finish them or update the pattern? Thank you!
LikeLike
I have fixed this. I’m so sorry!
LikeLike
Thank you!!!
LikeLike
I am a little late making one. Better late than never. 😀 do you use 2 strands of tarn or just one?
LikeLike
I just used one strand. Happy making!
LikeLike